

Putting up a new fence can be a satisfying DIY project. But no matter how sturdy the materials, your beautiful new boundary will only be as strong as its posts. So, securing and stabilising your metal fence posts properly is crucial.
At Metal Gates Direct, we understand the frustration of metal posts working themselves loose over time. But there are several effective ways to keep them firmly in place indefinitely. Follow our simple guide to stabilising metal fence posts for a boundary that will stand the test of time.
Choosing the Right Post
First things first - pick your post wisely. Opt for sturdy, galvanised steel rather than hollow posts prone to rusting. Check any plastic coatings are thick enough to withstand scrapes over time. And pick a width and depth to match your fence height and soil type firmly. Remember, extra length can always be cut down if needed.
Effective Base Fixings
The key to lasting stability lies in how you fix your post bases. Simply hammering them into soft ground won't cut it long-term in our damp climate. Expanding post anchors that swell to grip soil work well for most. Or consider extra-strong expanding resin that cures rock-solid underground. Both will hold fast no matter the weather.
If your soil is extremely soft, gravel bags make great temporary supports until natural backfill consolidates. Pop post shoes over the bases to spread weight without sinking. Or permanently concrete-in metal posts for superb anchorage. Though impractical for long runs, single posts at gates or changes of direction benefit hugely from the extra groundwork.
Firm Infill is Vital
Now here's a mistake made too often - failing to backfill properly. Simply replacing the soil, you removed then tamping lightly just won't cut it. Any air pockets and your posts will work loose in no time as rain washes soil away. The golden rule is infill must be as firm as possible.
Start by mixing in gravel or stone chippings to aid drainage. Use a post rammer or piece of wood to knock infill back in 6-inch layers at a time. Any soft areas at the sides must be well consolidated. And make sure the fill is mounded slightly to allow for settling. It's extra effort, but worth it for lasting stability.
Have a Clear Plan
Planning your posts layout logically from the start pays dividends later too. Allow enough spacing between posts so fencing panels or mesh sit smoothly without sagging. And check any end posts project far enough beyond boundaries to allow fixings.
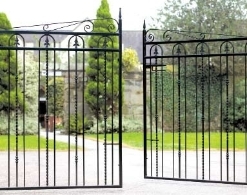
Consider using thicker posts in higher risk spots too. Such as either side of driveways to withstand knocks or changes of direction vulnerable to side forces. Gate posts warrant special attention - read our guide to choosing the right gates & posts.
And setting posts on a very slight backward lean counters the natural tendency to work forward out of ground. Built-in stability that costs nothing.
Check and Maintain
Once all posts are firmly set, check tops are all level & aligned unless you're deliberately stepping a boundary. Wind-blown movement can gradually loosen backfill before you know it. So do inspect periodically - especially after stormy weather.
Spot any leaning early and simply re-firm the backfill. Or replace broken posts as soon as possible to avoid wind damage spreading. A few quick checks and minor repairs now and then will maintain a rock-solid perimeter for decades to come.
We hope this helps explain the proper way to set and stabilise metal fence posts permanently. Don't let shallow footings spoil an otherwise sturdy DIY fence. Follow our guide and you can look forward to admiring a perfectly level, resilient boundary for many years. Let us know if we can assist with materials, handy post mix recipes or any other fencing advice.